Difference between revisions of "Decal Editing in Lugaru"
(New page: == Introduction == With this guide you will learn how to create a very basic piece of clothing for Lugaru. You will be making a dynamic color compatible armband that can be worn by rabbi...) |
m |
||
| (7 intermediate revisions by 2 users not shown) | |||
| Line 52: | Line 52: | ||
=== Permanent Cuts and Wounds === | === Permanent Cuts and Wounds === | ||
Give a sense of character development in your campaigns with permanent scars and bloody wounds that won't fade! | Give a sense of character development in your campaigns with permanent scars and bloody wounds that won't fade! | ||
| + | |||
| + | [[Category: Tutorials]] | ||
| + | [[Category: Modding]] | ||
| + | [[Category: Lugaru]] | ||
Latest revision as of 22:02, 19 June 2011
Contents
Introduction
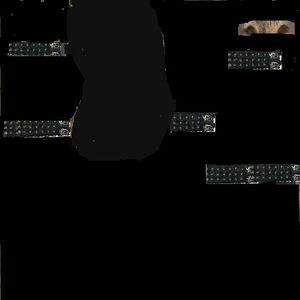
With this guide you will learn how to create a very basic piece of clothing for Lugaru. You will be making a dynamic color compatible armband that can be worn by rabbits. This guide will tell you how to create clothing for Lugaru, though clothing is a loose term as it is really just a decal applied on top of the player model and skin, it can be anything from a eyepatch to a prominent scar.
Glossary
- a texture is an image file that is applied to a 3d model. An untextured model looks like a plain, white sculpture.
- A skin is the main texture used on a model.
- A decal is a texture applied on top of a model's skin, allowing you to dynamically change the look of a texture without having to create many different variations. An example that you see regularly while playing Lugaru are the cuts applied to characters when slashed or bitten.
- A decal supports dynamic color when it uses only whites and grays, allowing its color to be defined in-game by the tinting console commands.
You will probably want to use Fur3.jpg or Fur2.jpg for your editing. Fur3 is the skin used by the player character in Lugaru, and they both show the grays and whites used for dynamic-color clothing rather well. All skins and clothes are contained within the Textures folder, located in Lugaru's Data folder.
Basics
Setting Up
Open up Fur3.jpg in graphics program, such as Photoshop. It looks sort of like Turner was skinned and stretched out to dry, which, metaphorically, is not far off from the truth. The details of how texures are applied is beyond the scope of this guide but think of the texture as an unfolded piece of origami that will be folded into the shape of the character. Look over the texture for a while and you will see where different parts of the texture are applied to the model. There is a texture called 'wireframe.jpg' that shows what parts of the texture are applied where to the model. It might be helpful to import this into your graphics program as well, to use as an additional reference.
Assuming your graphics program supports it, create a new layer. This is where you will be drawing the armband as you do not want to modify the actual fur skin, which is only there as a reference so you can see how the decal will look when applied on top of it.
Pre Processing
Before you can see your decal applied in Lugaru, you should check a few things:
- That you do not apply a different color to the calves than to the top of the thigh, when crouching the calf pokes through the thigh, so if you have black boots on for example and red pants, it will look very odd.
- Make sure that that there is no unwanted transparency. Often, when you are making the skin, you won't realise that part of what you think is opaque is actually just similarly colored texture underneath. To prevent this, hide the fur texture periodically that you are using as a base and check to make sure there are no unwanted empty spots.
Exporting
Delete the Fur3 layer and the Wireframe layer and save your decal as a PNG file. Be sure to choose non-interlaced and save it into your Textures folder as "yourdecalname.png". To use your new decal, enter the console in Lugaru and type clothes yourdecalname. For all of the tinting commands, make sure you check out the console guide.
Effects
Here are some examples of simple effects you can do in Photoshop.
Cloth
- Create two layers.
- Select an outline of an item and apply a noise filter (monochrome).
- Apply a gaussian blur filter.
- Draw some simple crease lines using a grey color burn.
- Apply a radial spin blur, using a very low value.
Leather
Download Zip's smooth leather texture and use the healing brush to apply it to your clothes.
Chain-mail
A chain mail effect can be created by using the healing brush with a built in chain-link pattern.
Possibilities
There are many things you can do with decals that may not be immediately apparent, but can give a bit of depth beyond simple clothing.
Eyes
In the top middle you see two black orbs with highlights that make them appear spherical, this texture is applied to your characters eyes, opening up all sorts of possibilities like glass, gouged/rotting, or bloodshot eyeballs.
Permanent Cuts and Wounds
Give a sense of character development in your campaigns with permanent scars and bloody wounds that won't fade!

