Difference between revisions of "Rain Weather Effects"
(→Rain particle effect) |
m (→Water "rain splash" shader effect) |
||
| Line 15: | Line 15: | ||
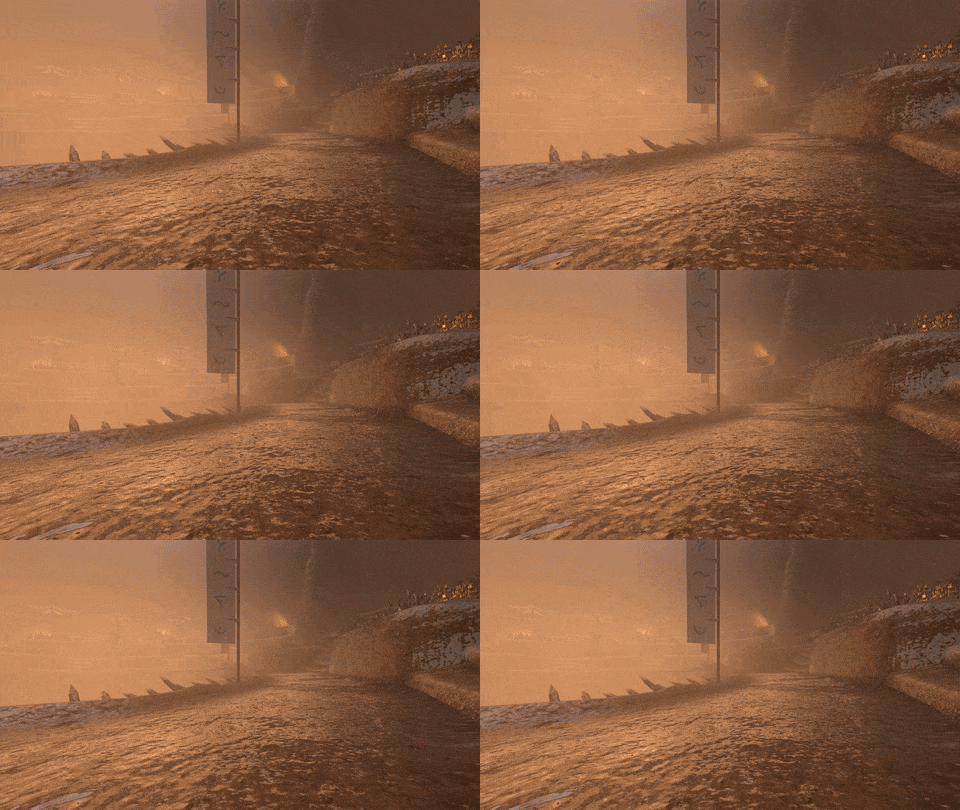
This adds the shimmering water layer effect to all the objects in the world. | This adds the shimmering water layer effect to all the objects in the world. | ||
| − | [[File:Rainy- | + | [[File:Rainy-shader3-z-small.gif]] |
To add this, add the '''<code>Custom Shader</code>''' entry to the level's script parameters. Set this value to '''<code>#RAINY</code>''' (make sure you use '''upper-case''', and it is '''<code>#RAINY</code>''' not '''<code>#RAIN</code>'''). | To add this, add the '''<code>Custom Shader</code>''' entry to the level's script parameters. Set this value to '''<code>#RAINY</code>''' (make sure you use '''upper-case''', and it is '''<code>#RAINY</code>''' not '''<code>#RAIN</code>'''). | ||
Revision as of 22:30, 18 November 2017
There are a total of four pieces that make up the rain weather effects that you see on a level like Tree Climb or Cave Arena.
Contents
[hide]Rain particle effect
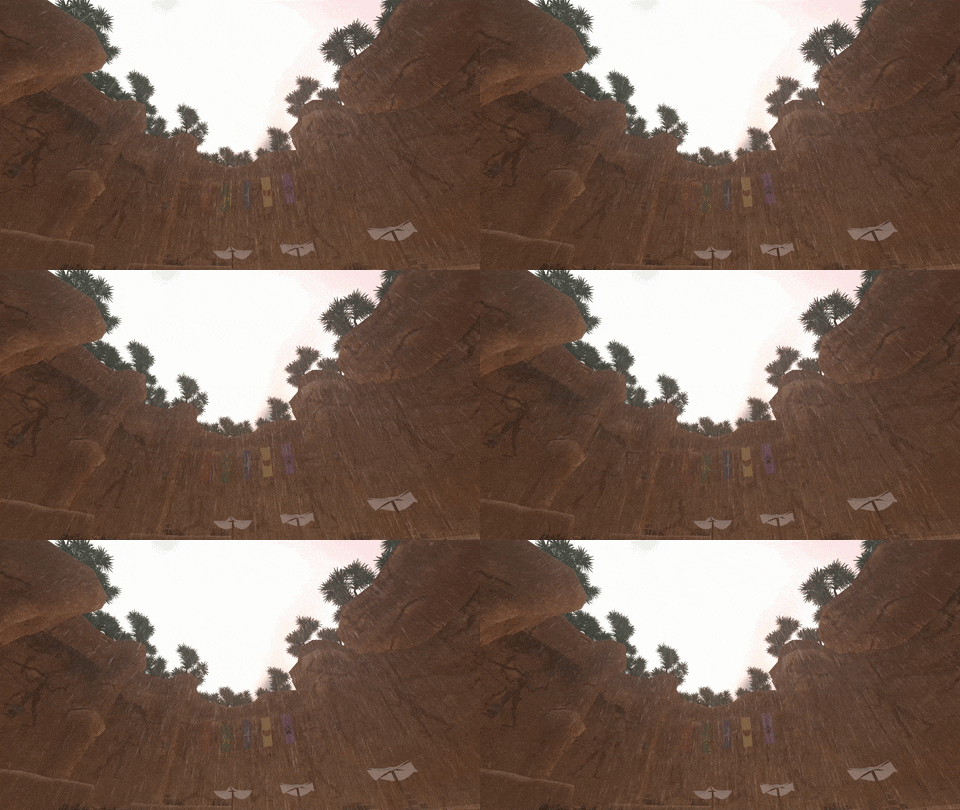
This adds the falling rain drop particles.
To add this, add the GPU Particle Field entry to the level's script parameters. Set this value to #RAIN (make sure you use upper-case).
Here's instructions for adding a GPU Particle Field value.
Water "rain splash" shader effect
This adds the shimmering water layer effect to all the objects in the world.
To add this, add the Custom Shader entry to the level's script parameters. Set this value to #RAINY (make sure you use upper-case, and it is #RAINY not #RAIN).
Here's instructions for adding a Custom Shader value.
Thunder and lightning hotspot
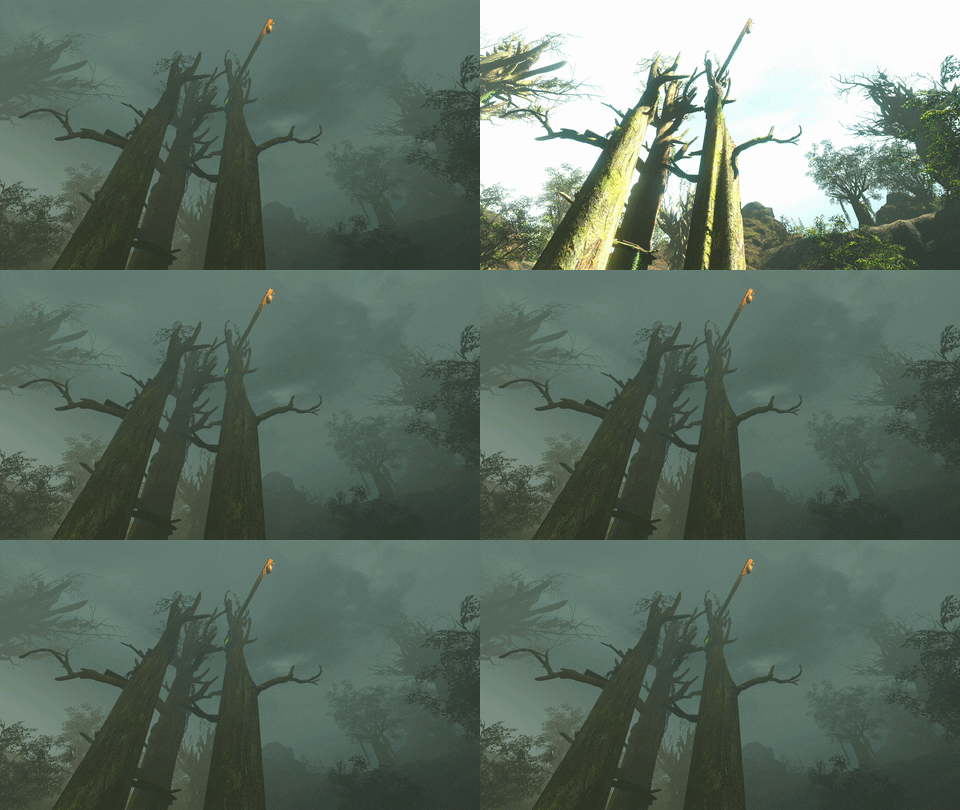
This add the periodic light flashes and thunder clap sound (the ambient rain sound is separate, in case you want to have a lightning storm going on nearby, but no rain).
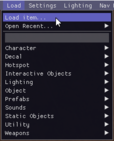
To add this, use the Load item... menu option:
- Spawn the new hotspot object: Top Bar -> Load -> Load item...
(this will open a new window to browse for files. It may be easier to do this step if you have the game in windowed mode) - Browse to
Data/Objects/Hotspotsand selectrain.xml - Your cursor will turn into a
+symbol - Click somewhere in the world to place the hotspot. The location doesn't matter, since it acts globally across the level.
There are no parameters for this hotspot, so you don't have to change anything at this point.
Note: If you want to customize this effect, you're going to need to make your own copy of the script for that hotspot (Data/Scripts/hotspots/rain.as) and edit that script.
Then copy the hotspot XML (Data/Objects/Hotspots/rain.xml) and point it at your new script.
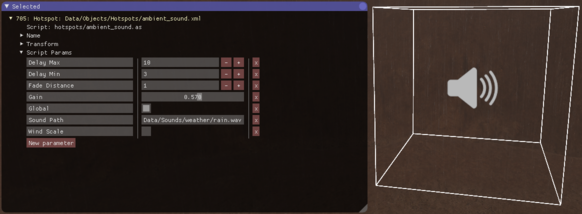
Ambient rain sound
This adds the constant rain sound that you hear throughout the level.
- Spawn the new hotspot object: Top Bar -> Load -> Sounds -> Ambient sound hotspot
- Your cursor will turn into a
+symbol - Click somewhere in the world to place the hotspot. The location doesn't matter, since it acts globally across the level
- Double click on the new object to select it
- Open the object properties: Top Bar -> Windows -> Selected (or just press the U key)
- Drill down to find the script params, and set these values:
Values for Ambient sound hotspot
-
Sound Path- Set this toData/Sounds/weather/rain.wav -
Gain- You might want to set it to0.5or even lower. We set ours to0.57 -
Global- (default value oftrueis fine) -
Delay Max- (default value of10is fine) -
Delay Min- (default value of3is fine) -
Fade Distance- (default value of1is fine) -
Wind Scale- (default value offalseis fine)
