Custom Characters: Difference between revisions
Silverfish (talk | contribs) →Blender: Put camera controls into a table and added a bunch of info to the second paragraph. |
Silverfish (talk | contribs) →Blender: Made steps into headings, Put controls into table in step 1 and improved instructions on how to import an obj. |
||
| Line 94: | Line 94: | ||
| Pan | | Pan | ||
|- | |- | ||
! Ctrl + middle mouse | ! Ctrl + middle mouse or scroll wheel | ||
| Zoom | | Zoom | ||
|} | |} | ||
===Step 1: Replace the white rabbit=== | |||
{| class="wikitable" | |||
|- | |||
! Control !! Function | |||
|- | |||
! Right click | |||
| Select object | |||
|- | |||
! Delete or X | |||
| Remove selection | |||
|} | |||
Press '''File > Import > Wavefront (.obj)''' to import an obj file. | |||
===Step 2: Bind your own mesh to the skeleton=== | |||
Shift + right-click = select more then 1 object<br/> | Shift + right-click = select more then 1 object<br/> | ||
| Line 111: | Line 118: | ||
You need to select the mesh, then the skeleton, before you press Ctrl+P | You need to select the mesh, then the skeleton, before you press Ctrl+P | ||
===Step 3: Paint weights=== | |||
Drop down box near file menu = switches between editing modes<br/> | Drop down box near file menu = switches between editing modes<br/> | ||
| Line 118: | Line 125: | ||
You may want to go to YouTube and look up a tutorial on painting weights in blender. | You may want to go to YouTube and look up a tutorial on painting weights in blender. | ||
===Step 4: Export your files=== | |||
With skeleton selected in object mode, export as .PHXBN, same for mesh but as .OBJ, needs to be in rest position. | With skeleton selected in object mode, export as .PHXBN, same for mesh but as .OBJ, needs to be in rest position. | ||
It is recommended that you test your character in engine with automatic weights to check that you have no errors before you start working on a final weight paint. It won’t look pretty, but will let you know early on if the character is going to work in the engine. | It is recommended that you test your character in engine with automatic weights to check that you have no errors before you start working on a final weight paint. It won’t look pretty, but will let you know early on if the character is going to work in the engine. | ||
Revision as of 04:16, 11 September 2015
based on this forum post by member Markuss.
There are two linked .zip file attached to the forum post. they can be found here:
http://www.markstockton.com/misc/Guide2/ExampleMan.zip
http://www.markstockton.com/misc/Guide2/Blender-Overgrowth-Win.zip
This guide assumes you are familiar with 3D Objects.
Basics
Characters in overgrowth consist of 4 .XML files, an .OBJ file and a .PHXBN file. The .PHXBN file is created in Blender and contains the skeleton and skin weighting info. The XML files just contain links to themselves and other files. They contain the following:
1 - Links to the .OBJ and .PHXBN files that the engine needs to rig the character.
<?xml version="1.0" ?>
<rig bone_path = "Data/Custom/Markuss/ExampleMan/Models/ExampleMan.phxbn"
     model_path = "Data/Custom/Markuss/ExampleMan/Models/ExampleMan.obj"/>
2 - A regular object file as described in the 3D reference guide.
<?xml version="1.0"?>
<Object>
	<Model>Data/Custom/Markuss/ExampleMan/Models/ExampleMan.obj</Model>
	<ColorMap>Data/Custom/Markuss/ExampleMan/Textures/ExampleMan_Color.TGA</ColorMap>
	<NormalMap>Data/Custom/Markuss/ExampleMan/Textures/ExampleMan_Norm.TGA</NormalMap>
	<ShaderName>cubemapobjchar</ShaderName>
</Object>
3 - Links to the first 2 files, and a load of animation files for each action.
<?xml version="1.0" ?>
<character>
    <appearance obj_path = "Data/Custom/Markuss/ExampleMan/XMLFiles/ExampleMan_Object.xml"
                skeleton = "Data/Custom/Markuss/ExampleMan/XMLFiles/ExampleMan_RigFiles.xml"/>
    <animations idle = "Data/Animations/r_idle2.xml"
                jump = "Data/Animations/r_jump.xml"
                roll = "Data/Animations/r_roll.xml"
                movement = "Data/Animations/r_movement.xml"
                wall = "Data/Animations/r_wall.xml"
                ledge = "Data/Animations/r_ledge.anm"
                medrightblock = "Data/Animations/r_activeblockmedright.anm"
                medleftblock = "Data/Animations/r_activeblockmedleft.anm"
                highrightblock = "Data/Animations/r_activeblockhighright.anm"
                highleftblock = "Data/Animations/r_activeblockhighleft.anm"
                lowrightblock = "Data/Animations/r_activeblocklowright.anm"
                lowleftblock = "Data/Animations/r_activeblocklowleft.anm"
                blockflinch = "Data/Animations/r_activeblockflinch.anm"/>
    <attacks moving_close = "Data/Attacks/haymaker.xml"
             stationary_close = "Data/Attacks/thrustpunch.xml"
             moving = "Data/Attacks/spinkick.xml"
             stationary = "Data/Attacks/frontkick.xml"
             moving_low = "Data/Attacks/soccerkick.xml"
             low = "Data/Attacks/sweep.xml"
             air = "Data/Attacks/legcannon.xml" />
 </character>
4 - Links to the third file and an AI script, this is the file you choose when loading a character.
<?xml version="1.0" ?>
<Actor>
	<Character>Data/Custom/Markuss/ExampleMan/XMLFiles/ExampleMan_AnimList.xml</Character>
    <ControlScript>enemycontrol.as</ControlScript>
</Actor>
Model and Texture Requirements

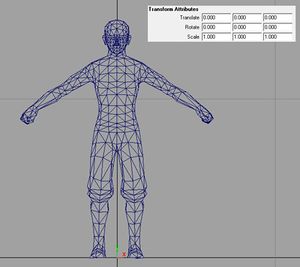
Models have to be triangles only and centered to the middle of the scene with location, rotation and scale set to zero. It should loosely match the pose and proportions of the Overgrowth characters, you can use the following file: ../Overgrowth/Data/Models/Characters/Rabbit/rabbit.obj.
If your character is not symmetrical, ignore the center line in the geometry, it has to be the "true" the center of the model, otherwise you will get errors.
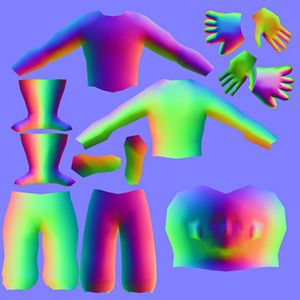
There is no character shader that supports tangent space normal maps. If you want to use a tangent space normal map anyway, the cubemap shader can be used. Though doing so will make the object look a bit different in the engine. More information about these shaders can be found in the 3D Objects article.

Blender
A repackaged version of Blender with the export addons and with the UI set up for making characters can be downloaded at the top of this article. It does not require an install and can be run from its folder. You may need to restart it once to get the export options to show up.
This article is not intended to teach how to use Blender, it only gives the information essential to get a character into the game. If you would like to learn more about Blender, the website cgcookie.com has a good free tutorial video series that will introduce you to the software. With that in mind, here are the basic camera controls in Blender:
| Control | Function |
|---|---|
| Middle mouse | Orbit |
| Shift + middle mouse | Pan |
| Ctrl + middle mouse or scroll wheel | Zoom |
Step 1: Replace the white rabbit
| Control | Function |
|---|---|
| Right click | Select object |
| Delete or X | Remove selection |
Press File > Import > Wavefront (.obj) to import an obj file.
Step 2: Bind your own mesh to the skeleton
Shift + right-click = select more then 1 object
Ctrl+P = bind selected mesh to selected skeleton (armature deform)
You need to select the mesh, then the skeleton, before you press Ctrl+P
Step 3: Paint weights
Drop down box near file menu = switches between editing modes
TAB = switches between last 2 editing modes
You may want to go to YouTube and look up a tutorial on painting weights in blender.
Step 4: Export your files
With skeleton selected in object mode, export as .PHXBN, same for mesh but as .OBJ, needs to be in rest position.
It is recommended that you test your character in engine with automatic weights to check that you have no errors before you start working on a final weight paint. It won’t look pretty, but will let you know early on if the character is going to work in the engine.