Checkpoints
Checkpoints allow you to set up goals that the player can achieve to advance progress in a level.
With them you can move the player spawn point upon death and allow defeated enemies to remain dead.
When the player advances progress, you can do nothing, play a dialog, spawn new enemies, or trigger a level win (load the next level).
You can make some of the checkpoints optional, so player progress is saved, but the player does not have to touch them to complete the level.
Contents
Using the checkpoint system
Start by creating a new level, or opening an existing level, and activating the editor by hitting "F1".
You might want to enable debug text (Settings -> Debug -> Enable "Draw In-Game Debug Window").
Debug keys (these will work once a level has checkpoints):
| L | reset the level to the currently achieved checkpoint |
| K | swap to the next checkpoint, or wrap around to the first (remember to hit "L" after to reset) |
To add the checkpoint system to a level:
Load -> Load Item... -> Data/Objects/Hotspots/overgrowth_level.xml
The table below shows the types of goals that can be used as checkpoints. Below the table are instructions for how to use each goal.
| reach | when touched, moves the player spawn point and saves defeated enemies. must touch it to complete the level/advance progress |
| reach_skippable | same as "reach" checkpoint but the player never has to reach it to complete the level/advance progress |
| defeat | the player must defeat a list of enemies to complete the level/advance progress |
| spawn_defeat | same as "defeat" checkpoint but the enemies to defeat are spawned at the beginning of that checkpoint |
"reach" checkpoint
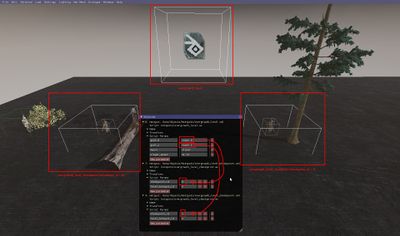
- Add the checkpoint hotspot to the scene. This is the trigger for the checkpoint. Load -> Load Item... -> Data/Objects/Hotspots/overgrowth_level_checkpoint.xml
- Add the placeholder object to the scene. This is the player spawn. Load -> Utility -> Placeholder
- Set the checkpoint hotspot "checkpoint_id" parameter to a value starting at 0 and increasing for each checkpoint you add
- Set the checkpoint hotspot "level_hotspot_id" parameter to the object id of the overgrowth_level hotspot
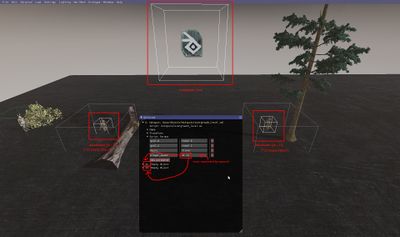
- Add a "goal_<number>" parameter to the overgrowth_level hotspot and set the value to "reach <number>", with the number from step 3
- Add a value to the overgrowth_level hotspot "player_spawn" parameter, delimited with spaces, with the id of the placeholder object from step 2 ("437 243 121"). The order matters, and the id for checkpoint 0 should go in the first spot, checkpoint 1 in the second spot, etc. You can see that you've written the correct ID if a transparent character model appears in the placeholder hotspot.
The numbers in checkpoints are tricky to get right. To add an additional checkpoint:
- Add another goal param to the overgrowth_level hotspot, and give it a number one higher than the previous goal. So if your previous goal was
goal_0, you would add another one with the namegoal_1 - Set the goal param's value to one higher than the previous goal. So if the previous one was
reach 5, this new param's value would bereach 6 - Load a checkpoint object, and set its
checkpoint_idparameter to a value that matches the reach goal in step #2. So, if the goal isreach 6, then this would just be6 - Set the checkpoint object's
level_hotspot_idparam - Load a placeholder object for the player to spawn at
- Add the id of the placeholder object to the end of the overgrowth_level's
player_spawnparam. So if it was previously123 456then it would now be something like123 456 784
"reach_skippable" checkpoint
Do all the same as a "reach" hotspot, but in step 5 set the value to "reach_skippable <number>" instead of "reach <number>"
"defeat" checkpoint
- Add an enemy to the level
- Add a "goal_<number>" parameter to the overgrowth_level hotspot and set the value to "defeat <number>", with the object id of the enemy from step 1
- Add additional enemy ids in the form of "defeat <some_enemy_id> <other_enemy_id>", just like in step two (e.g. "defeat 4 72 8")
"spawn_defeat" checkpoint
Do all the same as a "defeat" hotspot, but in step 2 set the value to "spawn_defeat <numbers...>" instead of "defeat <numbers...>"
Triggering dialogs
To trigger a dialog just before starting on a new goal (whether a "reach" or "defeat" goal):
- Add a dialog to the level and get it working with the dialog editor
- Add a "goal_<number>_pre" parameter to the overgrowth_level hotspot and set the value to "dialog <dialogname>", with the dialog name from step 1, and the number of the goal you want the dialog to be triggered before. (e.g. "goal_5_pre")
- Note that the dialog will be started again if you die and respawn, and the dialog can be used to set a new spawn point for the player
To trigger a dialog just after achieving a checkpoint goal (whether a "reach" or "defeat" checkpoint):
Do all the same as a dialog triggered before progressing to a given checkpoint, but name the parameter "goal_<number>_post" (e.g. "goal_5_post")
Troubleshooting
General
Make sure you don't use a start_dialogue hotspot on top of the player's spawn. Doing this will likely break the checkpoint system.
If you need to start a dialogue at the beginning of the level, use a goal_0_pre instead, with a value of dialogue "dialogue name here". Make sure you're setting the dialogue's name in the dialogue editor, and not in the script params or "Selected" window.
overgrowth_level_checkpoint
Open up all of your overgrowth_level_checkpoint instances, and look at the script parameters for them.
Make sure that checkpoint_id starts at zero, and increases by 1 (and only by 1) for each subsequent checkpoint. This will be true even if the first reach goal isn't goal_0!
Make sure that reach N values match the values for checkpoint_id.
overgrowth_level
up the script parameters for the overgrowth_level instance.
- The goals should start at
goal_0, not atgoal_1. - Look at the
player_spawnproperty. Count up the number of Ids in there (separated with spaces), and count up the number ofreachgoals you have. Those should be the same count. - Make sure that each
player_spawnid corresponds to a placeholder object in the world, and that you see a turner in a T-Pose inside each of them (which means that you typed them correctly in theplayer_spawnfield).

